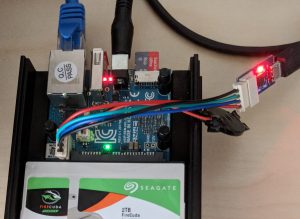
This page presents the steps to get a CentOS7 image up and running
on an Odroid HC1. It is specific to the HC1.
A copy of textareas was recently added. The default behavior
is to only select the contents of the area on click and the copy to
clipboard is a manual step. This is for saftey measures in
protecting the content of the clipboard. Below are buttons to
allow changing this behavior to copy the area to the clipboard on
click.
This guide was developed from experience gained from:
https://blog.christophersmart.com/2018/04/28/fedora-on-odroid-hc1-mini-nas-armv7As noted on the above blog, Hardkernel uses a proprietary bootloader on the uSD card rather than putting NAND or other storage on the board. It is this bootloader that makes the Odroid a special case, but well worth it for what you get in a server platform.
https://armv7.dev.centos.org/repos/images/CentOS-Userland-7-armv7hl-generic-Minimal-419-v26-1810-sda.raw.xzUsing this image, follow the standard steps for installing the CentOS image on the uSD card. Leave the boot and rootfs partitions mounted as you will need them for the following steps.
Moving the Rootfs and swap to the Sata drive
Currently, only the swap and rootfs partitions can be moved from
the uSD to the Sata drive. To do this, use a tool like fdisk
to delete these partitions from the uSD card (still delete the
Raspberry Pi fw partition). Install the CentOS image on the
Sata drive, delete the boot and Raspberry PI fw partitions, then
grow the rootfs partition.
Remember to delete the /boot/fw line from /mnt/__/etc/fstab on the
sata drive. Insert the uSD and Sata drives in the HC1 and
boot up! It is that simple.
The heartbeat blue LED can be enabled or disabled as desired:
Off:
You can EMail Robert at  his desk...